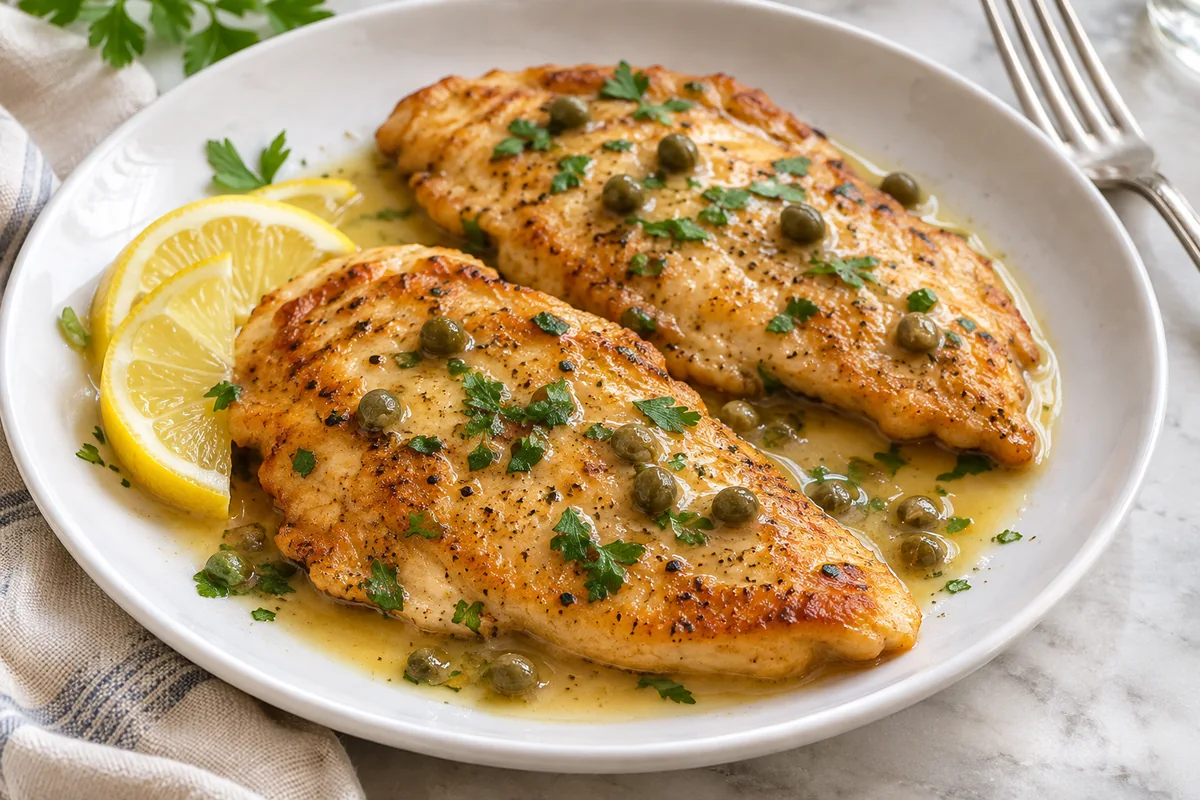
Lemon caper chicken piccata is built around contrast: a lightly browned cutlet, a sharp squeeze of citrus, the salty pop of capers, and enough butter to connect everything. The sauce should taste lively without making your mouth pucker. It should also stay loose enough to spoon over the chicken, not settle into a thick flour gravy. That balance comes from a thin coating on the meat and a short, controlled reduction in the skillet.
This version uses broth instead of wine, making the lemon and capers the main sources of brightness. Four evenly flattened cutlets cook in two batches, leaving room for browning and giving you useful browned bits for the sauce. Have the lemon juice measured and the butter cut before you start. Once the chicken leaves the pan, the remaining work moves quickly.
Recipe Summary
Equipment: 12-inch stainless steel skillet, shallow dish, meat mallet, tongs, whisk, and instant-read thermometer. Cooking is on the stovetop over medium-high, medium, and low heat; no oven is needed.
Ingredients
- 1 1/2 pounds boneless, skinless chicken breasts, sliced horizontally into 4 cutlets
- 3/4 teaspoon fine sea salt
- 1/2 teaspoon freshly ground black pepper
- 1/3 cup all-purpose flour
- 2 tablespoons olive oil, divided
- 3 tablespoons unsalted butter, divided
- 2 garlic cloves, finely minced
- 3/4 cup low-sodium chicken broth
- 1/4 cup freshly squeezed lemon juice
- 2 tablespoons drained capers, rinsed
- 1 teaspoon finely grated lemon zest
- 2 tablespoons chopped flat-leaf parsley
Method
- Place the 4 chicken cutlets, totaling 1 1/2 pounds, between sheets of parchment and pound to an even 1/4-inch thickness. Pat dry and season both sides with the 3/4 teaspoon salt and 1/2 teaspoon pepper. Put the 1/3 cup flour in a shallow dish, coat each cutlet lightly, and shake off loose flour. Discard unused dredging flour.
- Heat the 12-inch skillet over medium-high heat. Add 1 tablespoon of the olive oil and 1 tablespoon of the butter. When the butter foams, add 2 cutlets without overlapping. Cook about 3 minutes per side, until lightly golden and the thickest part reaches 165 F. Transfer to a clean plate.
- Add the remaining 1 tablespoon olive oil and cook the other 2 cutlets, about 3 minutes per side, also to 165 F. Lower the heat if the flour darkens too quickly. Transfer these cutlets to the clean plate and reduce the heat to medium.
- Add the 2 minced garlic cloves to the skillet and stir for 30 seconds. Pour in the 3/4 cup broth, scraping up golden browned bits with a wooden spoon. Simmer for 3 to 4 minutes, until the liquid has reduced by roughly one-third.
- Stir in the 1/4 cup lemon juice and 2 tablespoons rinsed capers. Simmer for 1 minute, then reduce the heat to low. Add the remaining 2 tablespoons butter in small pieces, whisking until the sauce looks glossy. Do not boil hard after adding this butter.
- Return all 4 cutlets and their collected juices to the skillet. Spoon the sauce over them and warm gently for 1 to 2 minutes. Fold in the 1 teaspoon lemon zest and 2 tablespoons parsley, divide among 4 plates, and spoon the caper sauce over each serving.
Getting the Cutlets and Sauce Right
Even thickness matters more than a perfect shape
A chicken breast usually has a rounded, thick end and a tapered tip. Simply slicing it in half can still leave a substantial ridge. Pound that ridge first, then work outward with light strokes. A quarter-inch cutlet is broad and quite thin, so use the flat face of the mallet rather than the toothed side. Ragged edges are harmless, but holes make the meat harder to lift neatly.
Patting the surface dry keeps the flour layer delicate. If the chicken is wet, flour forms a paste that can detach in slippery patches. Dredge immediately before cooking instead of leaving the coated cutlets piled on a plate. Tongs are useful for turning, but support a wide cutlet from underneath when transferring it so its thin center does not tear.
Read the skillet before adding liquid
The residue after searing should be golden to chestnut brown. Black flecks taste bitter and should not become the foundation of the sauce. If a patch burns, remove the skillet from the heat, carefully wipe away the scorched material, and continue with the garlic and broth. You will lose some roasted flavor, but preserve the clean lemon finish.
Stainless steel makes it easy to see those changes. A heavy nonstick skillet can also cook the chicken, although it generally leaves less fond for deglazing. In either pan, wait until the first side has formed a light crust before moving the cutlet. Constant nudging interrupts contact with the hot surface and encourages a pale, patchy coating.
Build gloss without making a heavy sauce
The flour carried into the pan supplies a little thickening, while cold butter gives the finished sauce its sheen. More flour is not the answer to a watery sauce. Let the broth reduce to the specified volume before introducing the lemon. Then swirl in the finishing butter gently; a hard boil can separate its fat and make the sauce look oily.
If the sauce reduces too far and drags across the pan, loosen it with warm water a teaspoon at a time. If it separates, take the skillet off the burner and whisk in a teaspoon of cool water. Neither correction needs a large splash of broth, which would bring more salt into an already concentrated sauce.
Ingredient Choices and Practical Changes
Choose capers packed in brine, then drain and rinse them before measuring. Salt-packed capers need a more thorough rinse and a brief soak according to their package directions. Rinsing matters because the sauce contains both seasoned chicken and reduced broth. Use the measured salt in the recipe, then judge the finished sauce before adding anything beyond it.
Fresh lemon juice brings a cleaner aroma than many bottled versions, and the zest adds fragrance without increasing sourness. Grate only the yellow outer layer; the white pith underneath tastes bitter. Lemons vary in acidity, so if a finished spoonful seems unusually sharp, dilute it gradually with a little warm water instead of trying to hide it under more capers or garlic.
For a gluten-free variation, replace the flour with an equal volume of a finely milled gluten-free all-purpose blend and check the broth label. Cornstarch alone creates a different, more brittle coating and is not the closest substitute. For dairy-free cooking, use a plant-based butter that is intended for cooking; olive oil alone will work for browning but will not give the final sauce the same creamy emulsion.
Serving and Preparing Ahead
Serve piccata on warm plates with plain rice, buttered noodles, or steamed potatoes, letting the sauce provide the seasoning. A green vegetable with a mild flavor keeps the capers prominent. For a different lemon-centered chicken dinner with a creamier finish, consider crispy Parmesan-crusted chicken with lemon garlic cream sauce. Its crumb coating gives a useful contrast to piccata's thin flour crust.
You can slice and pound the chicken the previous evening, refrigerating it covered on a lower shelf away from ready-to-eat food. Measure the capers, juice, and broth separately, but leave dredging and cooking until serving time. If you prefer a meal where the starch shares the spotlight, creamy lemon orzo with roasted chicken offers another direction for the same bright citrus mood.
Cooling, Storage, and Reheating
Check each cutlet at its thickest point for 165 F, following the FoodSafety.gov cooking temperature chart. Refrigerate chicken and sauce in shallow containers within 2 hours, or within 1 hour above 90 F, as outlined in the safe chilling guidance. Keep the refrigerator at 40 F or below and use leftovers within 3 to 4 days; see the cold storage chart.
Reheat covered in a skillet over low heat with a small splash of water until the chicken reaches 165 F. Turn once and spoon sauce over the surface to limit drying. The coating will soften during storage, so aim for tender chicken and a restored sauce rather than trying to recreate the initial crust.